
Using a hiking GPS requires the following steps:
"hiking route planning,
"a gpx file (which contains the itinerary, to obtain it you have to draw the route with an application or specialized software by exp: garmin BaseCamp, GPS Training-route planning software (os planner), gps.studio, Komoot. com,GPX Planner).
access your GPS.
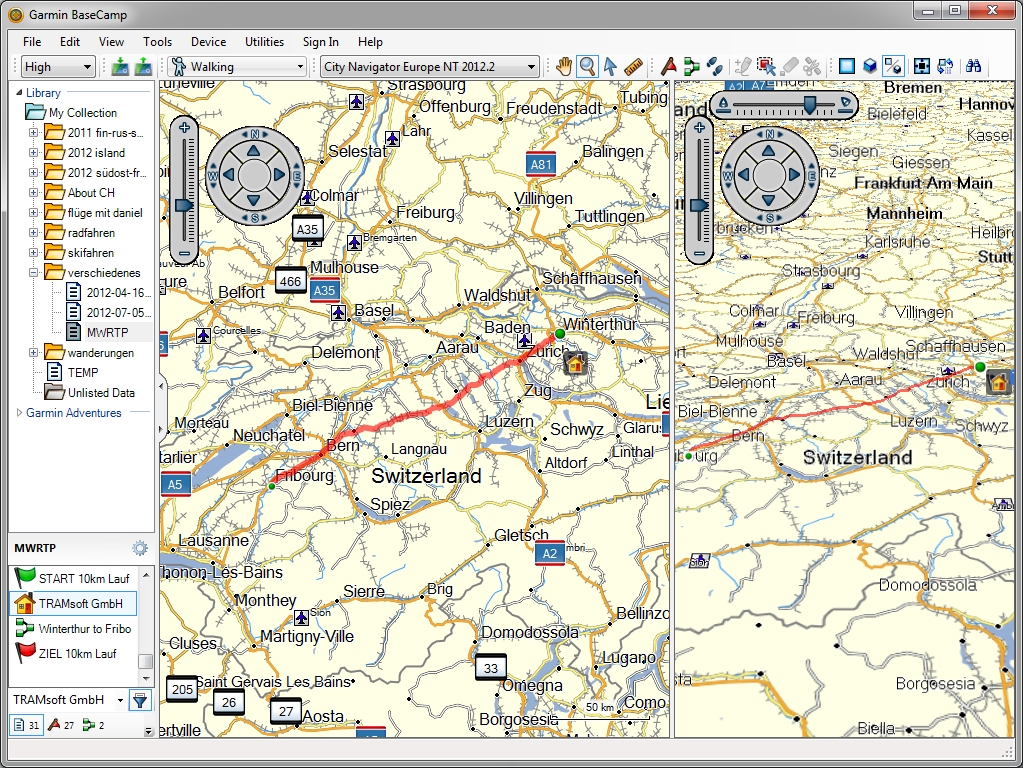
- Transfer your route to your GPS: you must then transfer the .gpx file to your GPS device. First of all it is necessary to import the GPX file into BaseCamp by following the steps below :
- Open BaseCamp, Select the File drop-down menu from the top toolbar
- Select Import…
- Find the location of the GPS file in the Import File window
- Select Open for Windows, or Import for Mac.
Once the GPX file has been downloaded, you should be able to transfer the data to your device. You can do this wirelessly if you have a gpsmap 66s, 66sr, 66i or one of the Montana 700 series using the app (STRAVA). alternatively, you can transfer all of this via a USB cable from a PC.
a. Connect the Garmin device to the computer
b. Select the data to send
To send one or more items, or a list :
- Select an element, list, or several elements (use CTRL + click or Shift + click)
- Select the Device drop-down menu
- Put the cursor on Send to device
- Select Send [‘Name’] to device, or Send selection to device.
c. Select the device to which you want to send the selected data
d. Select OK
The selected data will now be transferred to your device.
- Load the pre-planned route onto your GPS: you need to load it onto your GPS at the start of the walking days, we have a few things to check, make sure you have a satellite signal, calibrate the compass and then you know how to load this load route or track you created which is the .gpx file and then on your gps units just follow this arrow. main menu → routes → select route.
- You will review the navigation experience you get when walking with an outdoor GPS student whether it is navigating the compass page or navigating the map page which has a compass rose at the top. when navigating you have a number of pages you look at you have the main compass page which has the data at the top tells you how far it is from the end of the walk what time you are going for get there and also how far away your next wave point is if you are navigating a route. You can also navigate the map page which has the compass rose at the top so it covers where you are walking at the bottom, but you also have the directional arrow. There are a number of other pages that tell you how far you've traveled at each gear, how long you've been stopped, this is called the trip computer, and another page usually shows elevation data . All you do is follow that arrow.

- What you do at the end of a day's walk: how do you save the data you have collected, which is the trace that is the record of your journey. at the end of the walk, you just need to do two things you need to do, first stop navigating the route you have been on, and when you are not navigating a route, you see you lose that compass rose on your compass page and at the top of the map page the second thing is to save the trail so every time you walk you save a breadcrumb of where you have been that reason for that is anytime during the walk you could tell the gps to take you back the way you came and you could do a trail back but what you can do also at the end you can record this track which is a true record of your journey. page → main menu → track manager → current track → save track → enter name "***" → done.